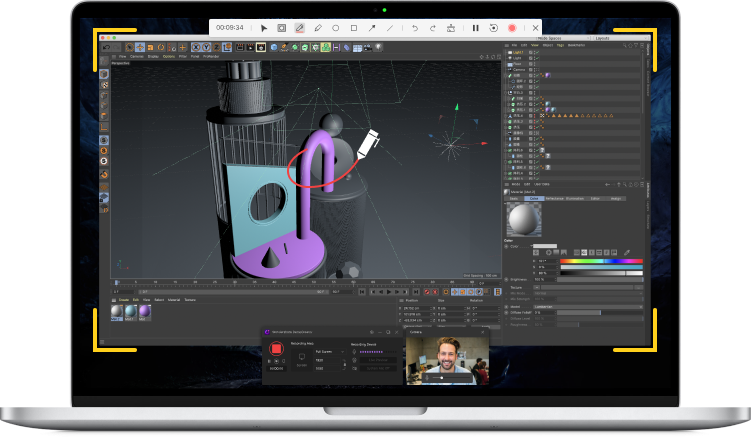
DaVinci Resolve Tutorial

Videos have the power to attract the audience and promote your brand. So, for making a professional video to connect with your audience, you will need a video editor. If you are just starting off video editing, then you should go for DaVinci Resolve. Well, it is one of the best free video editing tools used by professional editors.
Right from the editing of films, television shows to editing commercials; this software has exceptional features. It is available for Windows, Linux, and Mac and involves a very convenient and helpful DaVinci resolve support.
Also, it is a complete package that comes with professional 8K editing, color correction, and visual effects. This creative tool never fails to impress its users with its unique features. Moreover, it is picked by many professional editors as it permits both online and offline editing.
The "Davinci resolve 16 tutorial" covers its outstanding features, which include facial recognition that detects faces in the video clips, and built-in tools for video stabilization. It further comprises of picture-in-picture effects, dynamic zoom, and smart auto-editing that synchronizes audio and video footage. Furthermore, it is equipped with a dual timeline for quick navigation, cutting, and trimming.
Above all, it has a dedicated trim interface that enables you to edit every minute detail. Download Davinci Resolve first and then follow this in-depth tutorial on how to use it, various features, an alternative, and more:
Well, using any kind of editor isn't much of a task if you understand the proper working and how you can best results using certain features. In DaVinci resolve editing and video enhancing, here is what all you need to consider in how to use the DaVinci resolve tutorial:
1. Basic editing
DaVinci Resolve is a full-fledged editing suite that is equipped with plenty of creative tools. For basic editing, it has features that include adding texts, recording and editing audios, adding transitions, adding visual effects, color grading tool, sound mixing, equalizers, etc.
Here is a step-by-step guide to understanding the working procedure of this tool correctly:
2. Remove objects in DaVinci Resolve
It is pretty simple to remove unwanted objects from your video clip.
- After importing media and adding the audio and video clip to the timeline, go down to the color tab. You will have to add a correction node. To do so, you can either add a node with the right-click or press Shift S. This will create a new node for you. Just make sure you are in the Window
- Now, go down to the Pen Starting cutting out a rough shape around the object you want to remove. To get a sharp cut, you can even zoom in to your object and then create a rough outline.
- Check the keyframe mode for the corrector. With the right arrow key, go frame by frame and adjust the mask.
- Then open FX at the right-hand side of the screen and search Object Removal. Just drag and drop onto the second node. Under the Object Removal effect, go to the Scene Analysis Then head to Clean Plate Source. Under this feature, select "Internal" and click to build a plate. This will remove the selected object.
3. Color Grading
- Select the video footage to adjust color from the Timeline panel.
- The clip appears on the preview showing the time frame where the marker is placed. You will get everything on the bottom panel if you want to make adjustments.
- On the left side, three panels include Basic color wheels, Curves, and the Window Under the Primaries Wheels.
You are allowed to correct colors on 3 different phases of the footage: dark parts with Lift, the lightest parts with Gain, and its middle tones with Gamma. The adjustments made on each wheel overlap with the others making smoother color transitions between the darker and lighter parts of the clip. Offset wheels can also be used to correct the colors on any part of the whole clip. Adjust the colors on each wheel by clicking and dragging from its center and reset all by double-clicking on it.
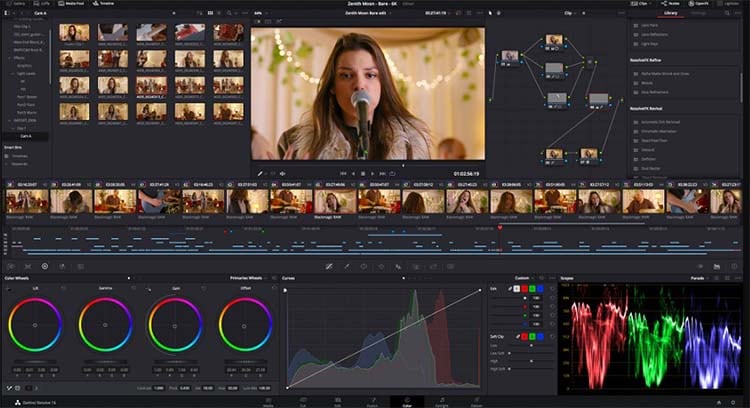
Note: Before changing colors on wheels, it is advised to balance whites and blacks of the clip by using the cross button in the top left corner.
- You can use the Master wheel to correct the luminance for each part of the clip. These act on all the channel colors in the same way.
- Now, come to Log wheels. It divides the clip among Shadows, Highlights, and Midtones. Below these wheels, you can also use adjustments controls to apply general correction on the entire clip, such as contrast, the color intensity with saturation, temp, tint to add color filters, and MD to add blur or sharpen details.
- Then, the Curves panel is used to adjust the intensity of each RGB color.
- Using the Windows panel, you can use this effect on a selected region of the clip, and the selected part can be customized.
4. Basic Fusion and Compositing
Before adding any effect, you should know about the Fusion composition workspace.
- Head to the Fusion workspace by selecting the correct icon in the bottom panel. Do not forget to select the clip you want to edit, and the playhead should be over it.
- Select the Effects Library to have a look at the list of available effects. To choose any effect, right-click in the node space and choose Add Tool.
- Once you learn to add a simple effect, you can move on with complex effects. You can add a new media piece by clicking on the Media Pool icon, followed by Import Media.
- Drag and drop the selected media in the node workspace. Just right-click in the node workspace and click on Add Tool followed by Composite then Merge. Merge nodes will composite the new piece with the original clip. You can even swap node inputs.
In this way, you can add simple or complex effects using the Fusion and Compositing feature.
5. Create Neon Animations
- Right-click the video clips in your timeline and choose "New Fusion Clip."
- Move on to the Fusion tab. Press Shift and Spacebar on your keyboard, type "Background" in the appearing text box, and select it. Again hit the Shift and Space key. This time, type "Paint" and select it. Repeat the key combination, type "Soft Glow", and select it.
- Select the media, click "Merge", and bring on the Soft Glow to the Merge node.
- Choose your background and slide down the Alpha slider to zero. Arrange your nodes by piling them on top of one another.
- Pick the spot where you want to start your animation. Click on the Paint node and zoom in using Ctrl and your mouse wheel. Using Brush controls, adjust the size of the paintbrush. Make sure the Multistroke option is chosen. Draw the first line.
Note: You are allowed to change the color of the drawn line by selecting the Soft Flow node and adjusting the color channels.
- Now, select the Paint node and move to a frame with the help of the right arrow key on your keyboard. Paint another line and repeat this process frame by frame to create your animation. (You will have to create a new Merge node to add different colors to the paint effect.)
- Now, this time select the second Paint node and decrease the brush size using Brush controls. Pick the second Soft Glow node and change it to a different color used in the first node. Draw the second line frame by frame like the way you did with the first node.
And, you are all caught up with the neon animation steps.
6. Screen Pump Effect
- Add a video and audio clip to the timeline in which you want to add the screen pump effect tool.
- Put the playhead at the point on the video where you want to use this effect. Just make sure the video clip is selected on the timeline while placing the playhead.
- Go to Inspector present at the top right corner of your screen. Under the Transform option, click the keyframe button next to zoom to create a starting keyframe. (Do not forget to click the keyframe toggle on your video clip so that you can see the keyframe as you add them.)
- Now, press the right arrow key on your keyboard 3 times to move the playhead forward 3 frames. Increase the zoom to 1.2 to create a second keyframe. Then press the right arrow key on your keyboard 3 more times to move the playhead forward another 30 frames. Change the zoom back to 1.0 to create the third keyframe.
- And it's done. You can play the video clip to see the applied screen pump effect.
Note: To speed up your screen pump, just drag your first and third keyframes closer to the middle one.
Wondershare DemoCreator - Grabador de Pantalla & Editor de Video Todo en Uno
- Graba la pantalla del escritorio y la cámara web simultáneamente
- Edita clips grabados rápidamente con una amplia gama de herramientas profesionales
- Numerosas plantillas y efectos integrados
- Exportación a MP4, MOV, MKV, GIF y múltiples formatos
 Descarga Segura
If you are a novice and find DaVinci Resolve editing and video modification a bit complicated, you can anytime look upon DemoCreator Video Editor. It is one of the most cost-effective video editors. This easy-to-learn and easy-to-use tool is perfect for recording videos, creating tutorials, presentations, and editing videos. Also, this tool gives a professional touch to your videos with powerful annotation tools and dynamic video effects.
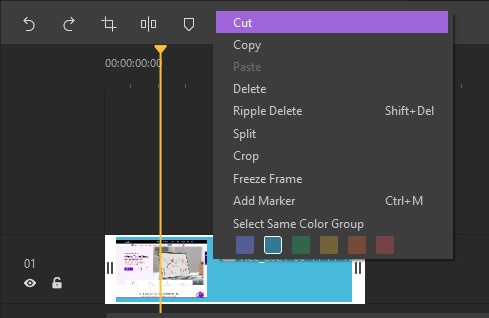
You can even cut, copy, change the volume, border, accelerate or slow down the speed of the video. If you cannot gel well with DaVinci Resolve or DaVinci resolve update, then you should switch to Wondershare DemoCreator.
Final words
Now that you know a lot about how to use DaVinci resolve 16, you should not delay and go ahead to buy Davinci resolve. You should start testing this amazing video editing program. Hopefully, now you can have a better quality of videos edited with different creative features.
This tool has the potential to take your creativity to another level. You can use this professional, well-made marketing tool to endorse your brand by telling a story via videos. So, what are you waiting for? Download the free version and let the magic begin.
David
chief Editor
0 Comment(s)